
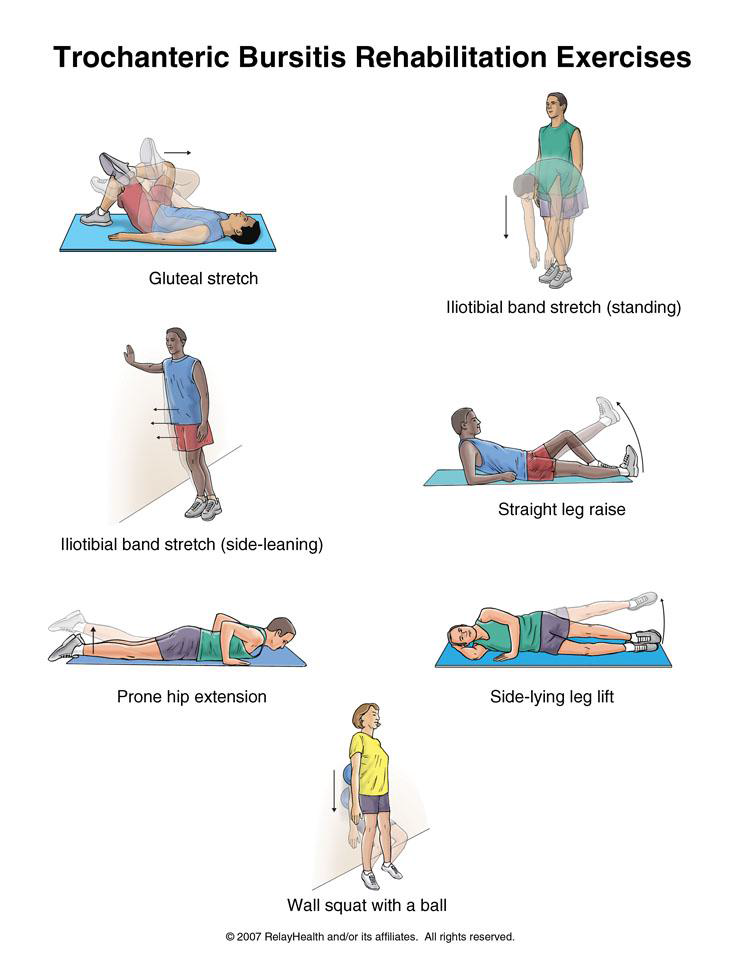
You can begin stretching the muscles that run along the outside of your hip using the first 3 exercises. You can do the strengthening exercises when the sharp pain lessens.
Written by Tammy White, MS, PT, and Phyllis Clapis, PT, DHSc, OCS, for RelayHealth.
Published by RelayHealth.
© 2009 RelayHealth and/or its affiliates. All Rights Reserved.
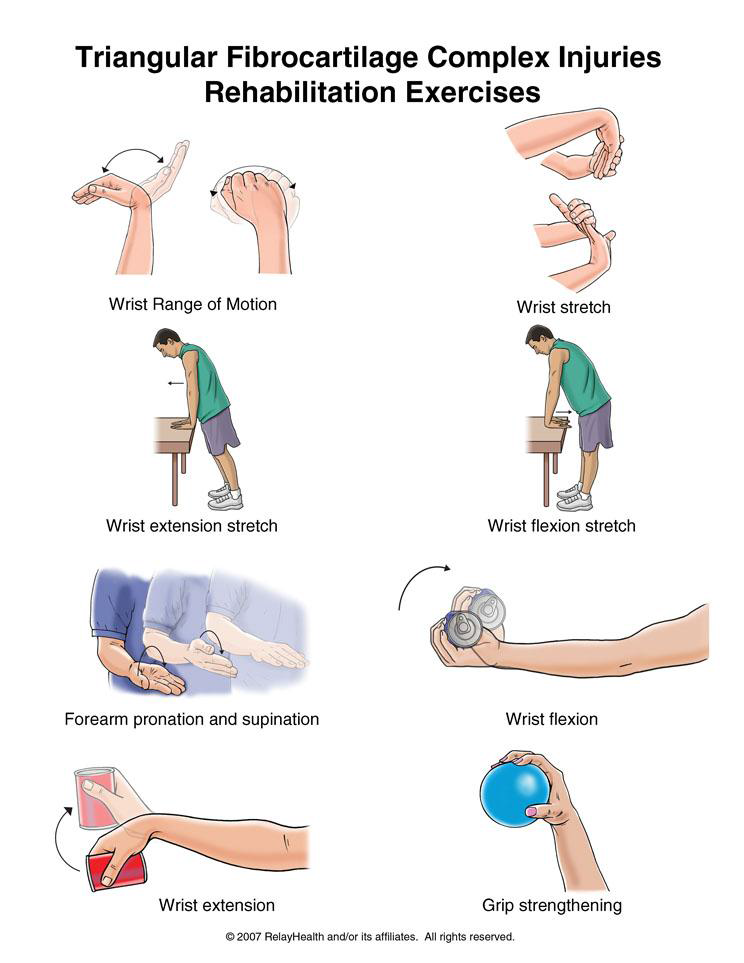
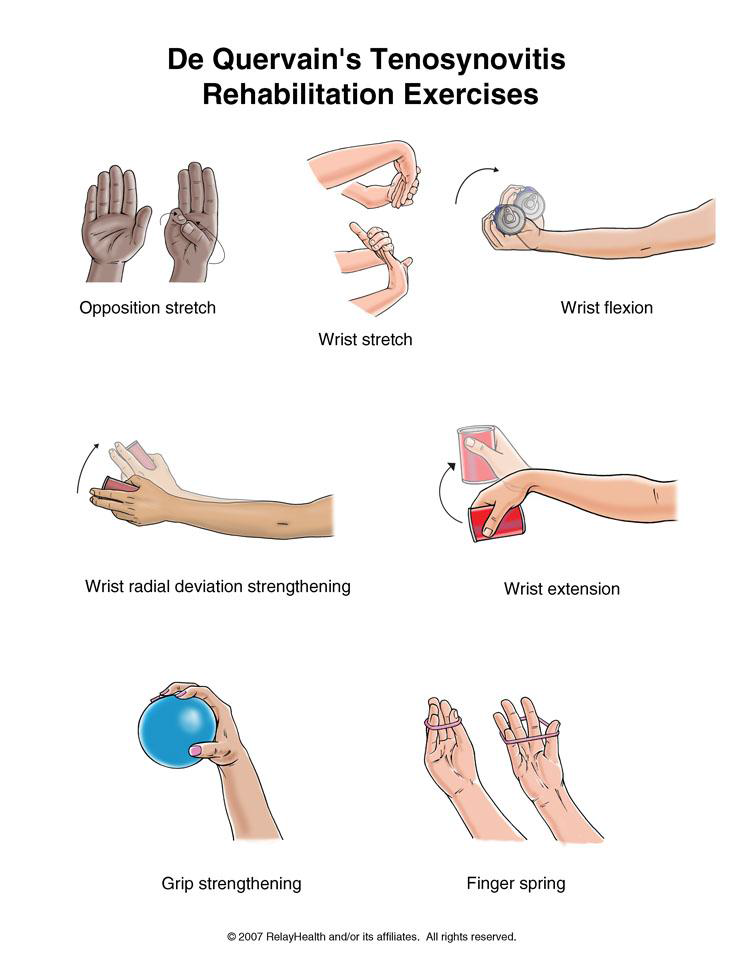
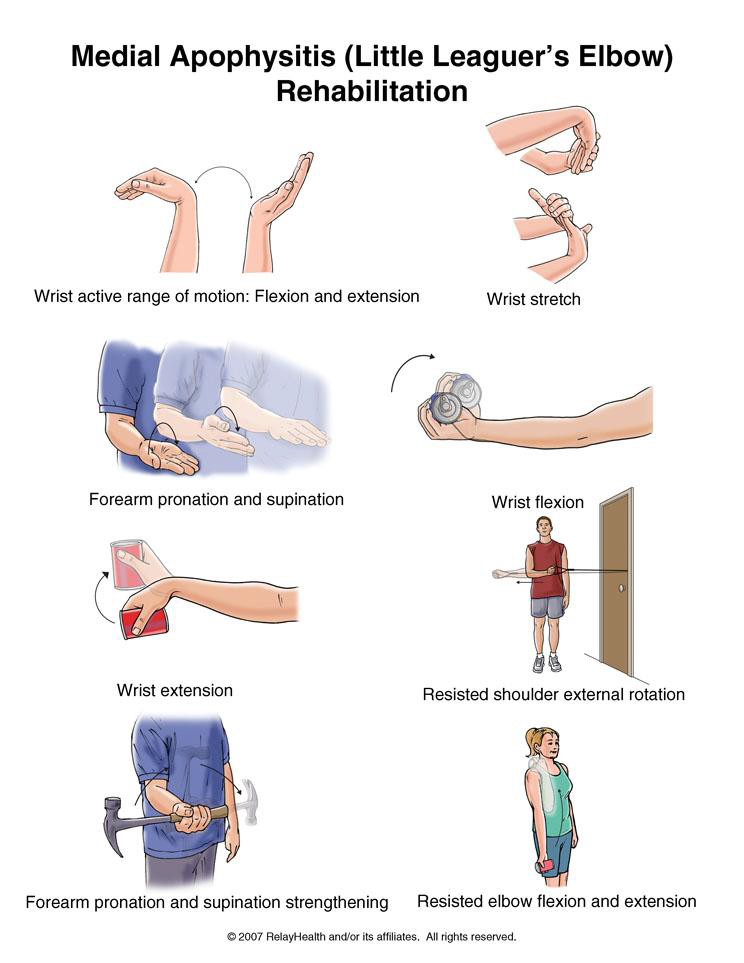
The first 5 exercises are stretching exercises. You may do these when the sharp wrist pain goes away. The last 3 exercises are strengthening exercises. You may do these exercises when stretching is nearly painless.
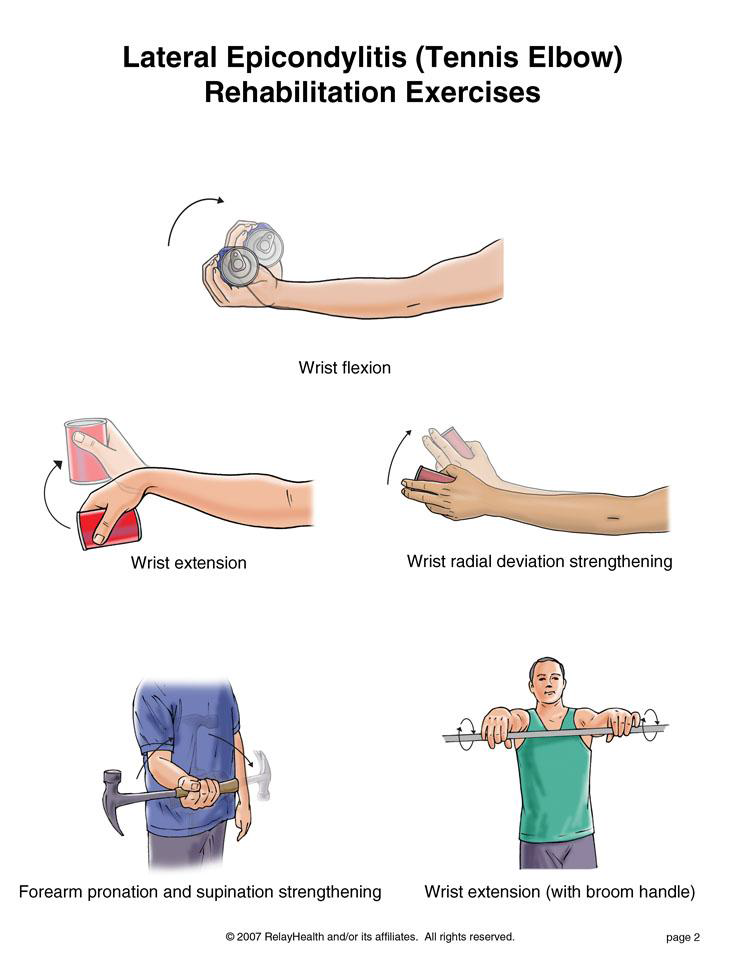
When this exercise becomes pain free, do it with some weight in your hand such as a soup can or hammer handle.
starting position. Do 3 sets of 10. Gradually increase the weight of the object you are holding.
Written by Tammy White, MS, PT, and Phyllis Clapis, PT, DHSc, OCS, for RelayHealth.
Published by RelayHealth.
© 2009 RelayHealth and/or its affiliates. All Rights Reserved.

You may do the stretching exercises when the sharp wrist pain goes away. You may do the strengthening exercises when stretching is nearly painless.
Written by Tammy White, MS, PT, and Phyllis Clapis, PT, DHSc, OCS, for RelayHealth.
Published by RelayHealth.
© 2009 RelayHealth and/or its affiliates. All Rights Reserved.
You may do all of these exercises when the initial pain is gone.
Written by Scott Coleman, PT, and Phyllis Clapis, PT, DHSc, OCS, for RelayHealth.
Published by RelayHealth.
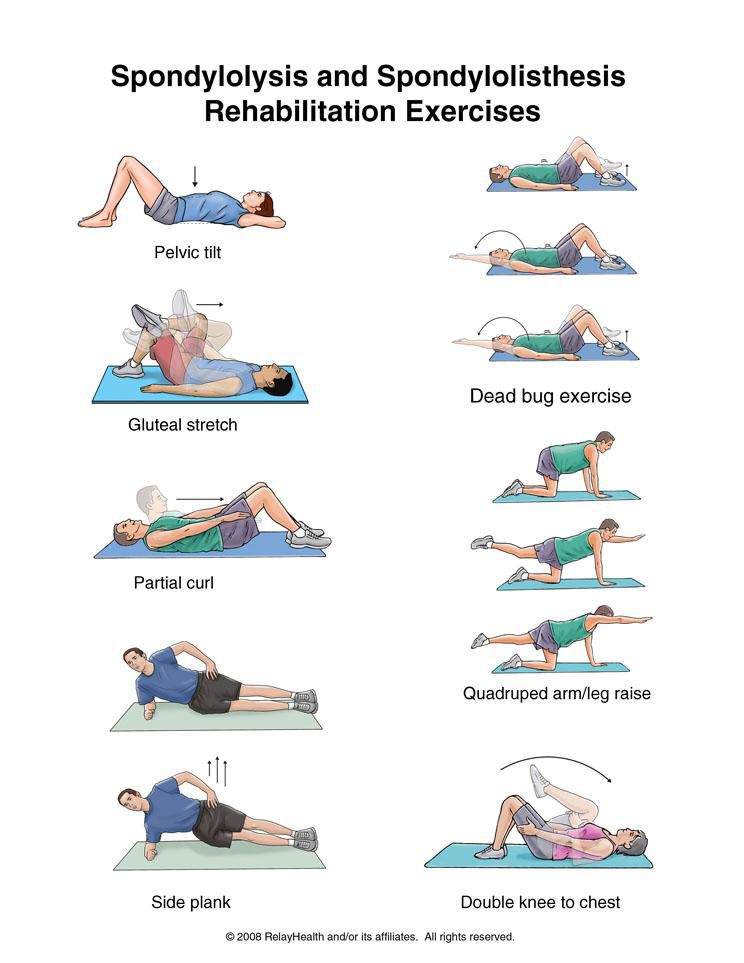
It is important to have strong abdominal muscles when the structures of your spine are weakened. These exercises help build strong stomach muscles.
Written by Tammy White, MS, PT, and Phyllis Clapis, PT, DHSc, OCS, for RelayHealth.
Published by RelayHealth.
© 2009 RelayHealth and/or its affiliates. All Rights Reserved.
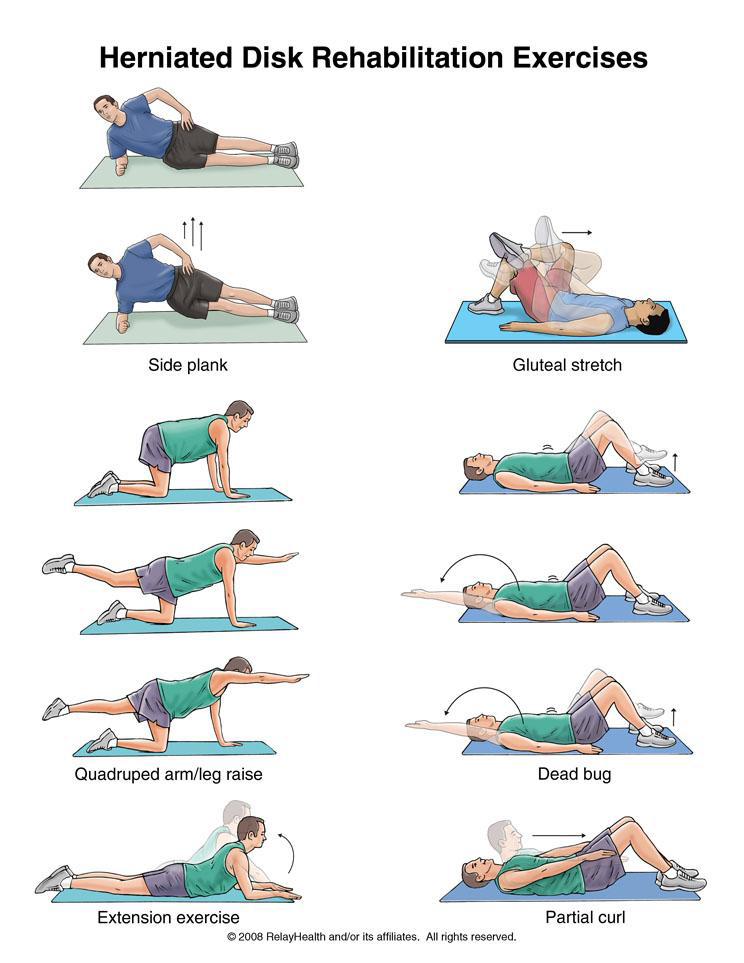
After lying on your stomach for 5 minutes, prop yourself up on your elbows for another 5 minutes. Lie flat again for 1 minute, then press down on your hands and extend your elbows while keeping your hips flat on the floor. Hold for 1 second and lower yourself to the floor. Repeat 10 times. Do 4 sets. Rest for 2 minutes between sets. You should have no pain in your legs when you do this, but it is normal to feel pain in your lower back. Do this several times a day.
Do the following, partial curl exercise only when you no longer have pain in your buttocks or legs.
If you have a herniated disk, you should limit driving and other sitting activities to no more than 30 minutes at a time. Walking is also good exercise for you.
Written by Tammy White, MS, PT, and Phyllis Clapis, PT, DHSc, OCS, for RelayHealth.
Published by RelayHealth.
© 2009 RelayHealth and/or its affiliates. All Rights Reserved.
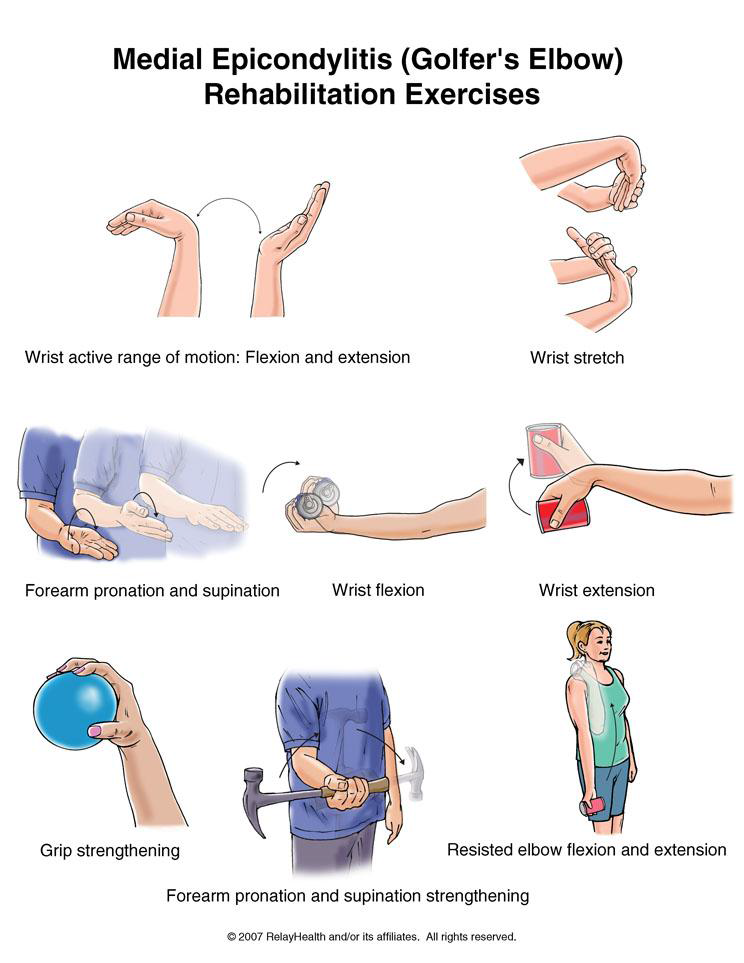
The first 5 exercises are stretching exercises. You may do these when the sharp wrist pain goes away. The last 3 exercises are strengthening exercises. You may do these exercises when stretching is nearly painless.
When this exercise becomes pain free, do it with some weight in your hand such as a soup can or hammer handle.
starting position. Do 3 sets of 10. Gradually increase the weight of the object you are holding.
Written by Tammy White, MS, PT, and Phyllis Clapis, PT, DHSc, OCS, for RelayHealth.
Published by RelayHealth.
© 2009 RelayHealth and/or its affiliates. All Rights Reserved.

You may do the stretching exercises when the sharp wrist pain goes away. You may do the strengthening exercises when stretching is nearly painless.
Written by Tammy White, MS, PT, and Phyllis Clapis, PT, DHSc, OCS, for RelayHealth.
Published by RelayHealth.
© 2009 RelayHealth and/or its affiliates. All Rights Reserved.

You may do all of these exercises when the initial pain is gone.
Written by Scott Coleman, PT, and Phyllis Clapis, PT, DHSc, OCS, for RelayHealth.
Published by RelayHealth.

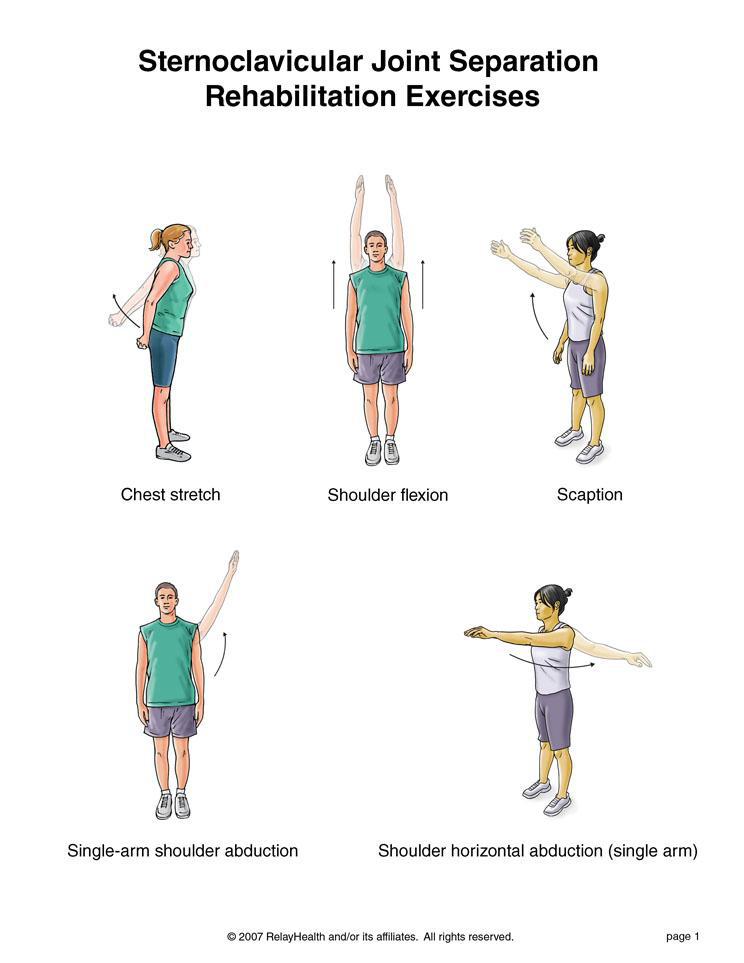
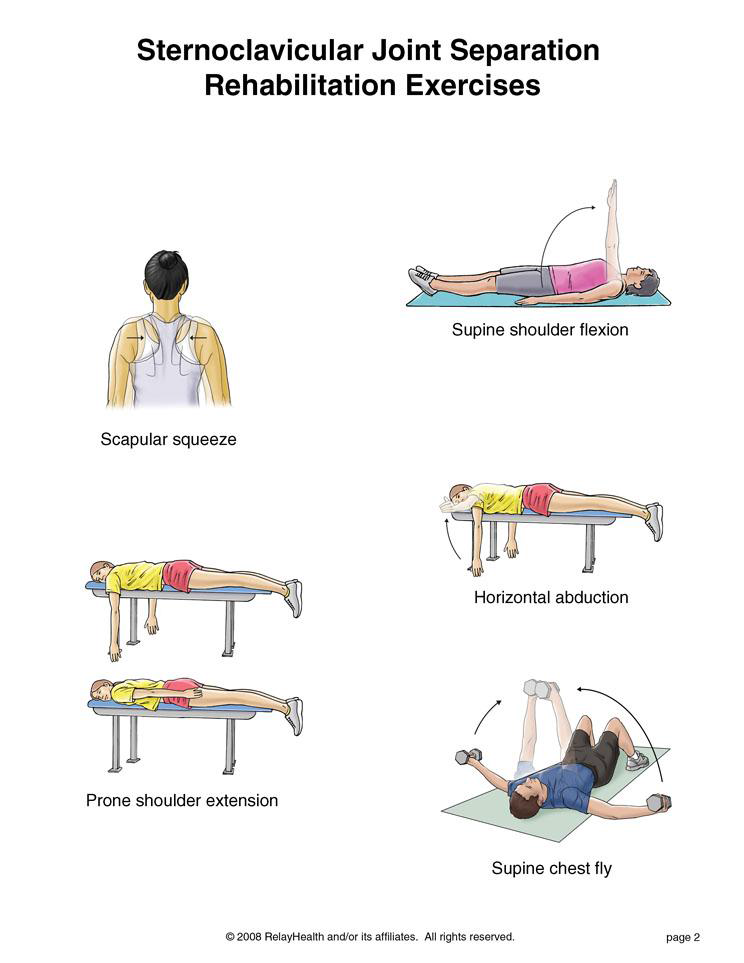
You may do the stretching exercises right away. You may do the strengthening exercises when stretching is nearly painless.
Written by Tammy White, MS, PT, and Phyllis Clapis, PT, DHSc, OCS, for RelayHealth.
Published by RelayHealth.
© 2009 RelayHealth and/or its affiliates. All Rights Reserved.

You may do the stretching exercises right away. You may do the strengthening exercises when stretching is nearly painless.
Written by Tammy White, MS, PT, and Phyllis Clapis, PT, DHSc, OCS, for RelayHealth.
Published by RelayHealth.
© 2009 RelayHealth and/or its affiliates. All Rights Reserved.
You may do the stretching exercises right away. You may do the strengthening exercises when stretching is nearly painless.
Written by Tammy White, MS, PT, and Phyllis Clapis, PT, DHSc, OCS, for RelayHealth.
Published by RelayHealth.
© 2009 RelayHealth and/or its affiliates. All Rights Reserved.


You may do the stretching exercises right away. You may do the strengthening exercises when stretching is nearly painless.
Written by Tammy White, MS, PT, and Phyllis Clapis, PT, DHSc, OCS, for RelayHealth.
Published by RelayHealth.
© 2009 RelayHealth and/or its affiliates. All Rights Reserved.
until the dumbbells touch. Lower slowly back to the starting position. Do 3 sets of 10. Gradually increase the amount of weight in your hands.
Written by Tammy White, MS, PT, and Phyllis Clapis, PT, DHSc, OCS, for RelayHealth.
Published by RelayHealth.
© 2009 RelayHealth and/or its affiliates. All Rights Reserved.
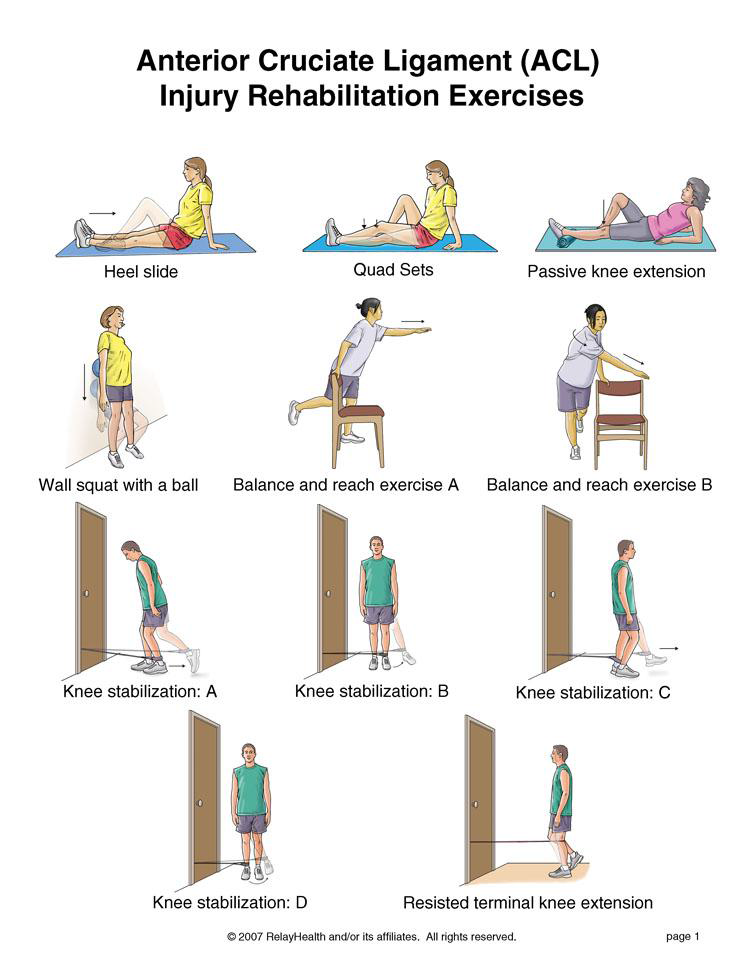
Do these exercises as soon as your healthcare provider says you can.
As these exercises become easier, add a weight to your hand to give you some resistance
Written by Tammy White, MS, PT, and Phyllis Clapis, PT, DHSc, OCS, for RelayHealth.
Published by RelayHealth.
© 2009 RelayHealth and/or its affiliates. All Rights Reserved.


Written by Tammy White, MS, PT, and Phyllis Clapis, PT, DHSc, OCS, for RelayHealth.
Published by RelayHealth.
© 2009 RelayHealth and/or its affiliates. All Rights Reserved.
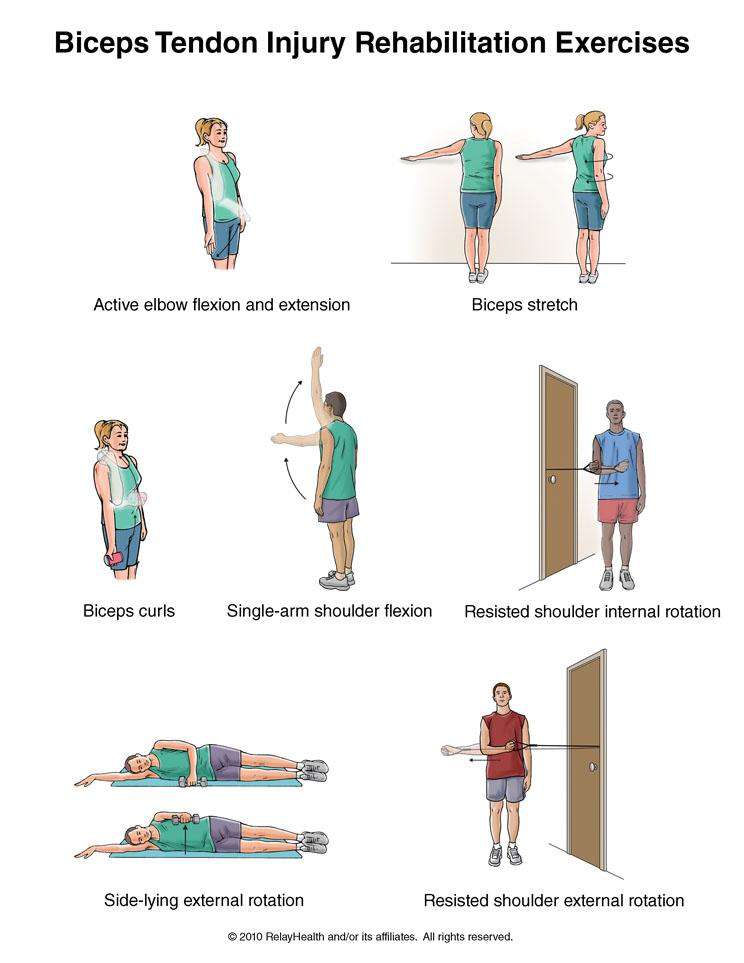
You may do these exercises when your pain has improved.
Written by Tammy White, MS, PT, and Phyllis Clapis, PT, DHSc, OCS, for RelayHealth.
Published by RelayHealth.
© 2009 RelayHealth and/or its affiliates. All Rights Reserved.
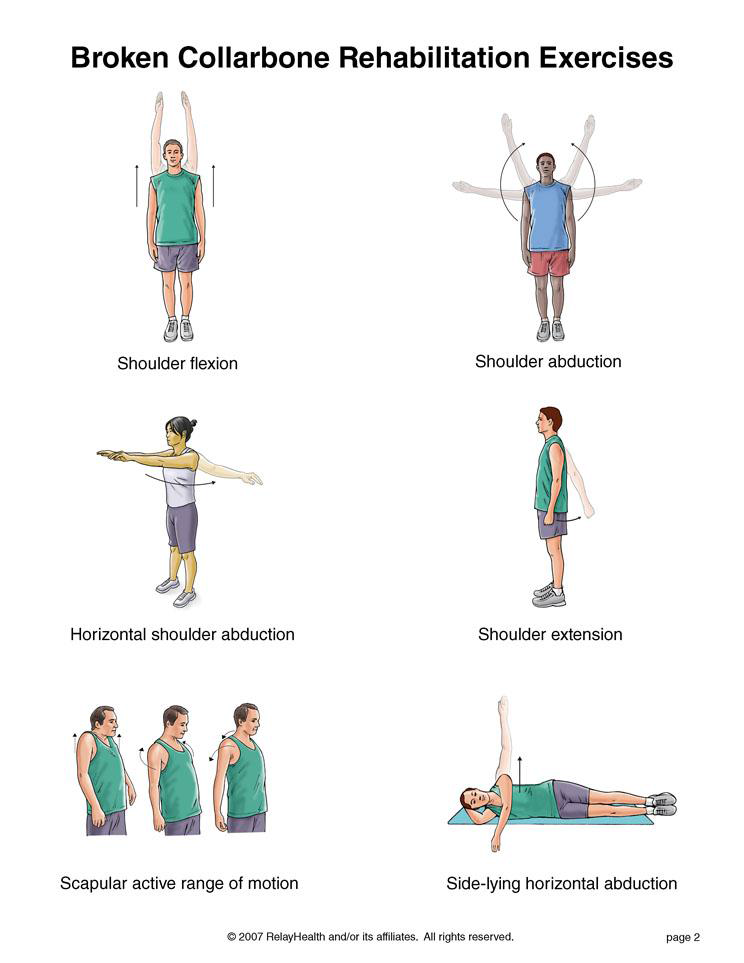
You may do all of these exercises right away.
Written by Tammy White, MS, PT, and Phyllis Clapis, PT, DHSc, OCS, for RelayHealth.
Published by RelayHealth.
© 2009 RelayHealth and/or its affiliates. All Rights Reserved.
Written by Tammy White, MS, PT, and Phyllis Clapis, PT, DHSc, OCS, for RelayHealth.
Published by RelayHealth.
© 2009 RelayHealth and/or its affiliates. All Rights Reserved.
Do these exercises as soon as your healthcare provider says you can.
As these exercises become easier, add a weight to your hand to give you some resistance.
Written by Tammy White, MS, PT, and Phyllis Clapis, PT, DHSc, OCS, for RelayHealth.
Published by RelayHealth.
© 2009 RelayHealth and/or its affiliates. All Rights Reserved.

Written by Tammy White, MS, PT, and Phyllis Clapis, PT, DHSc, OCS, for RelayHealth.
Published by RelayHealth.
© 2009 RelayHealth and/or its affiliates. All Rights Reserved.
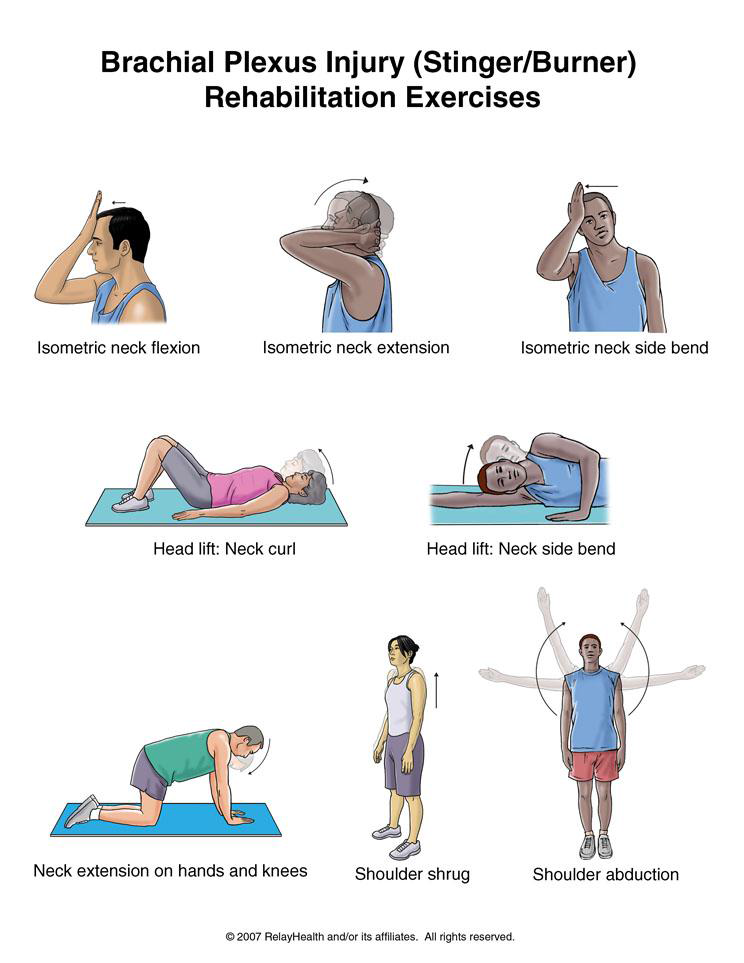
You can begin these exercises when moving your neck in all directions (up, down, right, left) does not cause numbness or tingling down your arm or into your hand. Do not do any exercises that make your neck pain worse.
Written by Tammy White, MS, PT, and Phyllis Clapis, PT, DHSc, OCS, for RelayHealth.
Published by RelayHealth.
© 2009 RelayHealth and/or its affiliates. All Rights Reserved.
Written by Tammy White, MS, PT, and Phyllis Clapis, PT, DHSc, OCS, for RelayHealth.
Published by RelayHealth.
© 2009 RelayHealth and/or its affiliates. All Rights Reserved.
Written by Phyllis Clapis, PT, DHSc, OCS, and Pierre Rouzier, MD.
Published by RelayHealth.
© 2009 RelayHealth and/or its affiliates. All Rights Reserved.
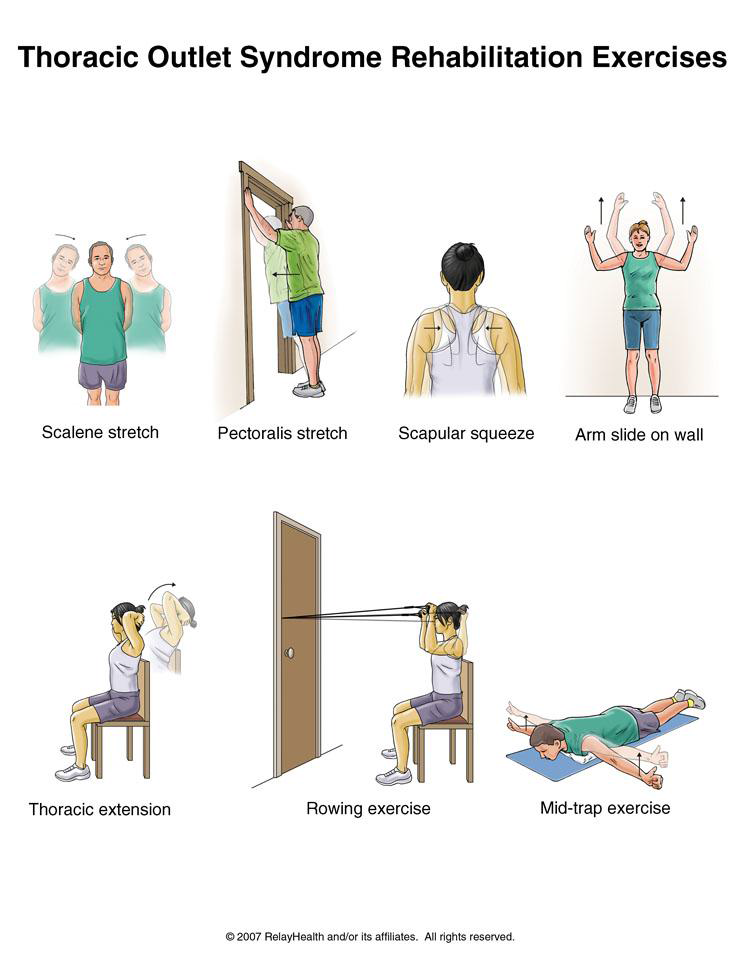
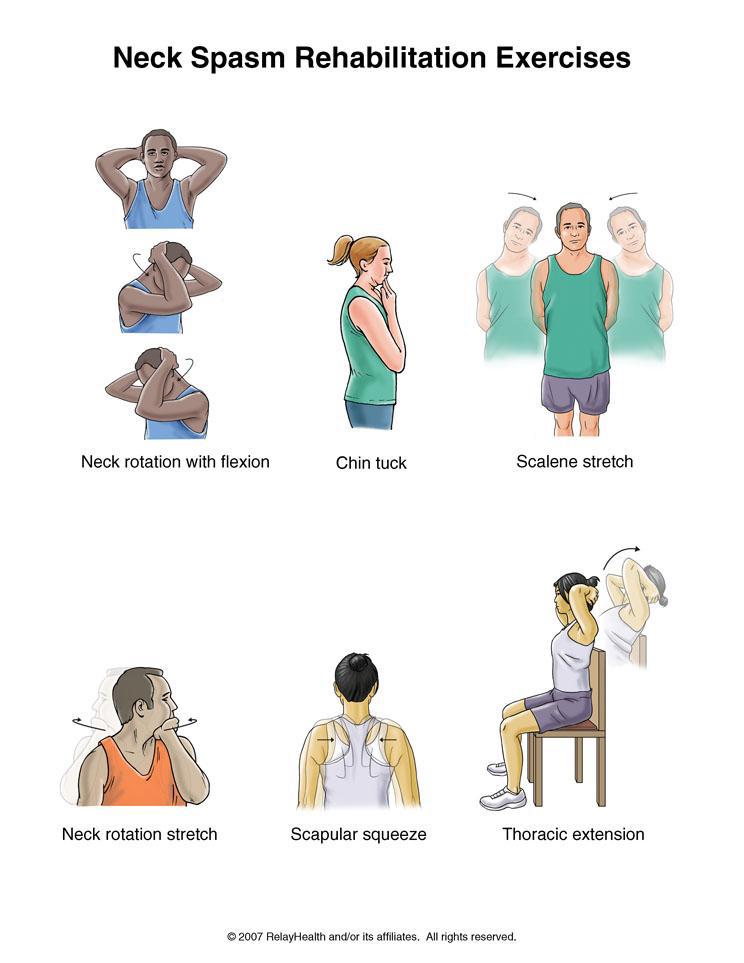
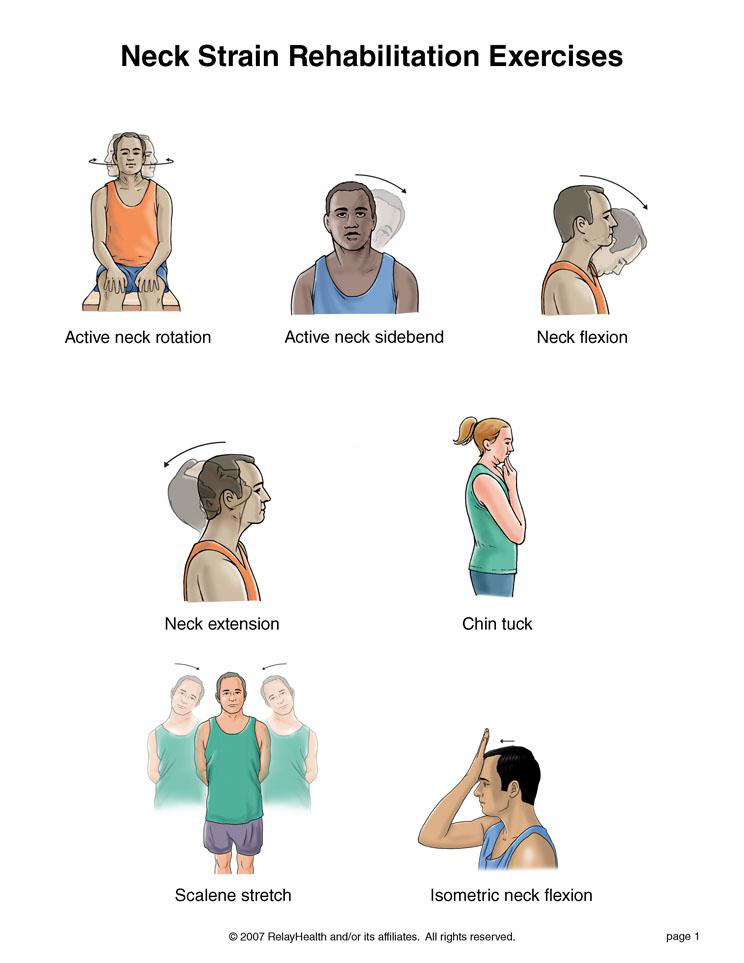
Do these exercises only if you do not have pain or numbness running down your arm or into your hand. The first 6 exercises are meant to help your neck remain flexible. Do not do any exercises that make your neck pain worse.
Written by Tammy White, MS, PT, and Phyllis Clapis, PT, DHSc, OCS, for RelayHealth. Published by RelayHealth.
© 2009 RelayHealth and/or its affiliates. All Rights Reserved.
You may do all of these exercises right away but avoid any movements that increase your pain.
Right: Turn your head to the right and clasp your hands behind your head. Let the weight of your arms pull your chin to the right side of your chest. Relax. Hold for a count of 15. Do this 3 times.
Left: Turn your head to the left and clasp your hands behind your head. Let the weight of your arms pull your chin to the left side of your chest. Relax. Hold for a count of 15. Do this 3 times.
Right side: Rotate your neck by looking over your right shoulder. Lift your right hand and place your palm on the left side of your chin. Push your chin with your palm toward your right shoulder. Hold for a count of 10. Do this 3 times.
Left side: Rotate your neck by looking over your left shoulder. Lift your left hand and place your palm on the right side of your chin. Push your chin with your palm toward your left shoulder. Hold for a count of 10. Do this 3 times.
Written by Pierre Rouzier, MD, and Phyllis Clapis, PT, DHSc, OCS, for RelayHealth. Published by RelayHealth.
© 2009 RelayHealth and/or its affiliates. All Rights Reserved.